Chapter 2 - Fabricating the Tail
Section 1 - Raw Stock Preperation
The photo below shows our desired result. A 24" by 48" sheet of ¼” last-a-foam with a single layer of BID (Bi-Directional) fiberglass on both sides. This piece will be enough to cut all of our horizontal ribs, our horizontal stabilizer spar, elevator spar, vertical fin spar and rudder spar. We will then repeat the process and make two 24" by 48" sheets of 3/8" last-a-foam with a single layer of BID (Bi-Directional) fiberglass on only one side each for sheeting both sides of the horizontal stab.

Finished Panel Stock
Step 1: It is a good idea to prepare all the cloth for a job
before hand and fold it up and put it in marked zip lock bags. That
way when, when your resin is mixed you are ready to go. So first
we cut all the glass for the first step of preparing our three
sheets of foam for the horizontal stab--that is we want to have
four sides of glass bagged and tagged..
Clear your work table and roll out your BID. The first thing you need to do when starting a new roll of BID is to cut a large triangle of cloth off the end to give you an edge on the 45 degree Bias. Do this now. There are two ways to insure you are cutting on the 45 degree bias. One is to use a 45 degree slot in your table that can be used as a guide. You must pull the glass straight to use this method. My favorite method is to observe the pattern in the glass cloth--you can see straight lines formed by the weave of the BID where the horizontal and vertical fibers intersect. Cut along this interface.
Then lay out a sheet of 2’ X 4’ foam on the glass with one long edge lining up with your fresh 45 degree bias edge leaving about an inch exposed. Then mark, or just go ahead and cut along the other long edge. This will result in enough glass to cover one side of your sheet. You will have to cut the triangular end off one side of the strip and lay it over the other end to completely cover the sheet. See the photo below. Go ahead and cut the triangle off. Cut a total of four strips from your roll of BID and cut the triangle off the end of each, bag and tag these. Two will be used for the ¼” sheet and one each will be used for the two 3/8” sheets. Put your glass away and spread a drop cloth on your work table. It is time to lay down some fiberglass.
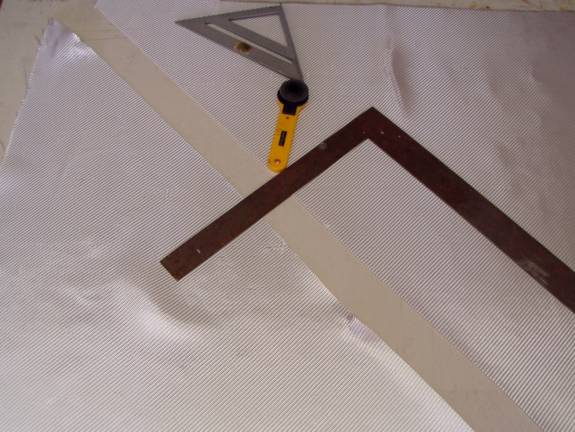
Cutting Cloth on the 45 Bias
Step 2: Our next job is to slurry one side of the foam. Refer back to the beginning of the manual and mix up a batch of slurry using about 100 grams of resin (this would be 100 grams of resin, 27 grams of hardener and about an equal amount by volume of glass bubble microspheres).
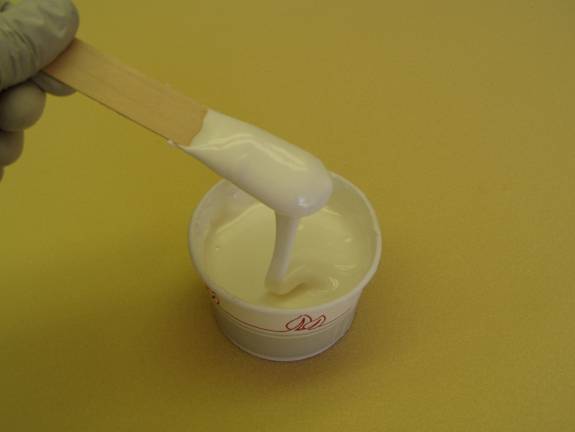
Slurry Consistency
Pour the mixture onto the sheet and using a squeegee, spread the
mixture across the foam. You want to get as thin a coating
as you can get away with, we just want to seal the foam. Spread
it with the squeegee, the squeegee it off leaving the foam wet. Use
moderate pressure on the squeegee, but do not damage the foam.
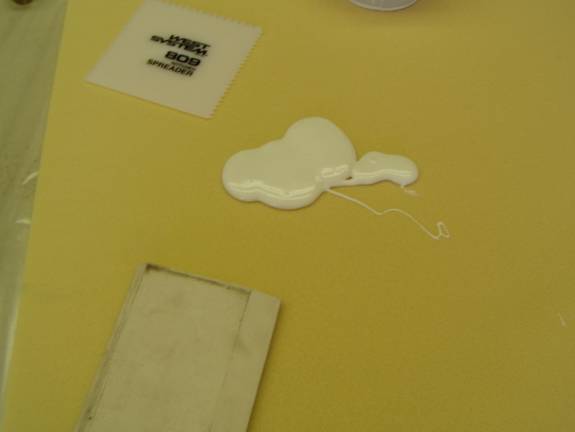
Slurry the Foam
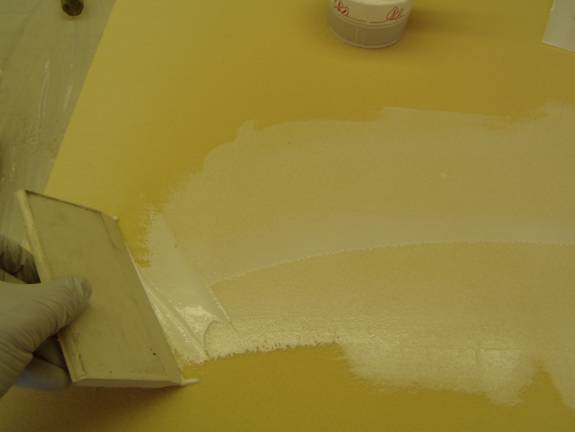
Spread Slurry
You may have to mix up a smaller batch of micro to finish the first
panel. When you are satisfied with your slurry job, layout
the fiberglass on the panel.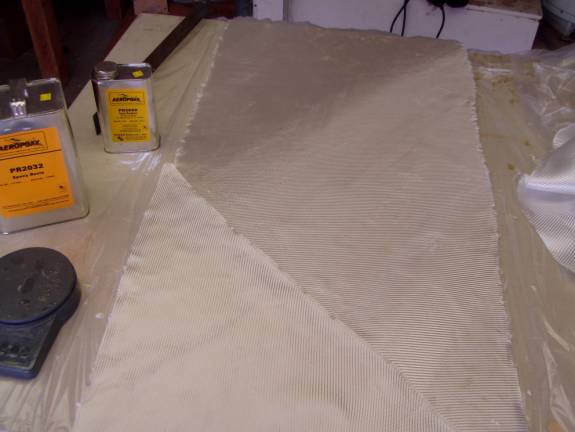
Layout Glass BID on Slurried Panel
Fiberglass does not like being pulled on the 45 degree bias, it will
bunch up in one axis. Stretch the glass out along its original
axis of the direction of the glass threads by pulling it in the direction
of the selvage. Lay the section you cut off one end to completely
cover the sheet. The slurry will hold the cloth in place and
make it easier to get it oriented.
Step 3: Mix up a batch of epoxy, again about 100 grams of resin is a good starting point. Pour it on the cloth and using a brush and the squeegee, wet the glass out. Start in the middle and force the air bubble toward the edges. You will get the feel for the correct amount of resin. This takes a little practice, the brush can be used to add resin or remove resin. Use the squeegee to smoothly distribute the resin across the sheet.
It is a good idea to use a bit too much resin and work it into the glass and insure there are no trapped air bubbles. Once you are satisfied that the glass is well wet out, take sheets of paper towels and lay across the surface and lightly soak up the exess resin. Don't wipe the surface, just spread the paper towel out over the fiberglass surface, rub it down gently, then peel it off. You should see the surface going from a glossy look (too much resin) to a flat appearance (just right). Using this technique you will be able to obtain a panel that is optimized for its strength to weigh, fully wet out, but not too much excess resin.
When one sheet of fiberglass is not enough to cover the part, you can overlap multiple sheets. The photo above is a good example of two sheets of fiberglass cloth used on a panel. Insure that you have about 1.5" of overlap where the two sheets of BID meet. Wet out the first sheet first, then lay down the second sheet and insure you have not trapped any air bubbles where the overlap occurs.
When you are satisfied with your fiberglass job, set the ¼” sheet aside to cure on a flat surface.
Step 4:You can now move onto the two sheets of 3/8” last-a-foam. Slurry and glass only one side of each of two sheets of 3/8” last-a-foam. Set these aside to cure with the long edge of the foam supported an inch or two off the ground, the glass side up. This will put a slight curve in the sheets which will help you later when you sheet the horizontal stab.
Step 5: Wait 24 hours and repeat the glassing process on the other side of the ¼” last-a-foam. Leave the 3/8” sheets only glassed on one side. Congratulations we are now ready to start cutting out parts.
Cutting out the parts.
Once the ¼” sheet of foam has been glassed on both sides and is cured we are ready to cut out the parts for the tail. Refer to the diagram below on how to allocate the parts to the sheet to insure we can get all the parts we need out of the one sheet. If you mess up a part, don’t worry about it. You can always make up another ¼” fiberglass foam sandwich. We will be needing it for additional parts in the future anyway.
Parts List
- 2 ea. Hrib1,2,3,4
- 2 ea. Erib 1,1a,2
- 2 each horz stab spar
- 2 each elevator spar
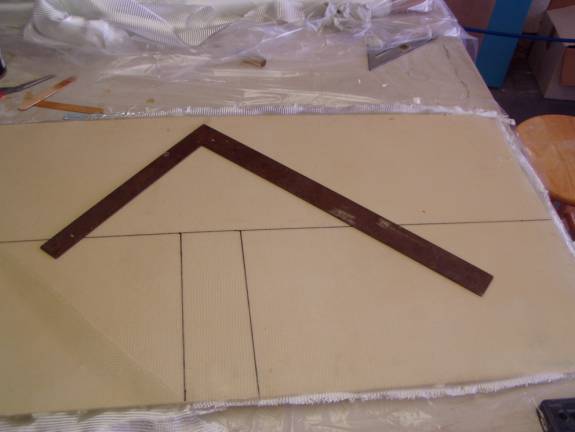
Divide Panel to Minimize Waste
Step 6: First we mark up the sheet with a sharpie marker. Divide
the sheet down the long axis, then divide one half along the short
axis. Each of the smaller rectangle pieces will result in a set of
ribs and the 48” long
piece will give us our spars. Cut these sections on the marked
lines with an industrial razor knife.
Step 7: Print out several copies of the rib templates. Cut out one set and arrange the ribs on the smaller rectangular panels as shown in the diagram below.
- Horizontal Stab Layout Plan
- Horizontal Ribs-Sheet 1 of 3
- Horizontal Ribs-Sheet 2 of 3
- Horizontal Ribs-Sheet 3 of 3
- Horizontal Spar
- Elevator Spar
- Leading Edge
Cut out the Ribs
Step 8: Use a scroll saw, band saw, exacto knife or packing
knife to cut the pieces out. Replace your blades if needed.
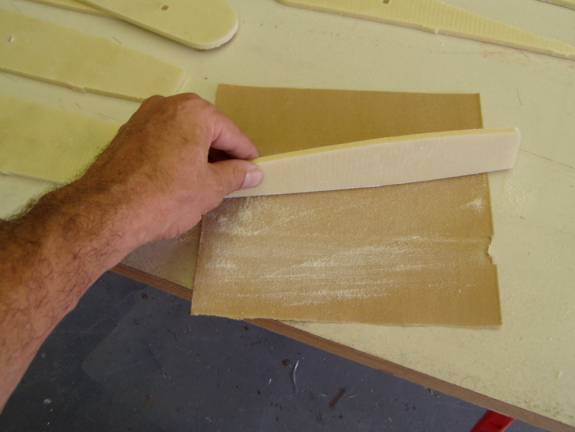
Smooth Edges
Cut the parts slightly oversize, then sand the edges down to the
proper size. Use your second template that you printed out
to measure parts against. Lay the parts on the template and
continue sanding the edges until the part just barely fits within
the black lines. Be careful, it is easy to get carried away with
this sanding process and end up with parts that are too small.
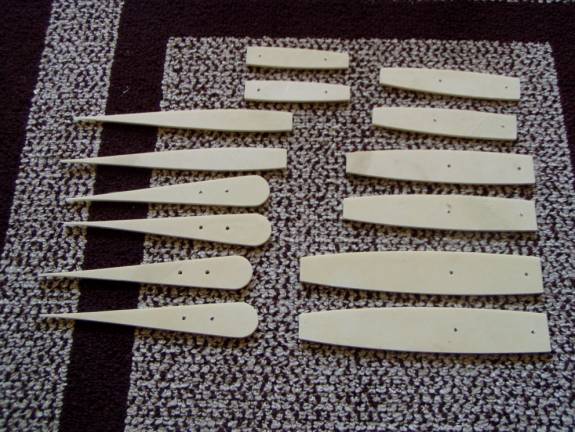
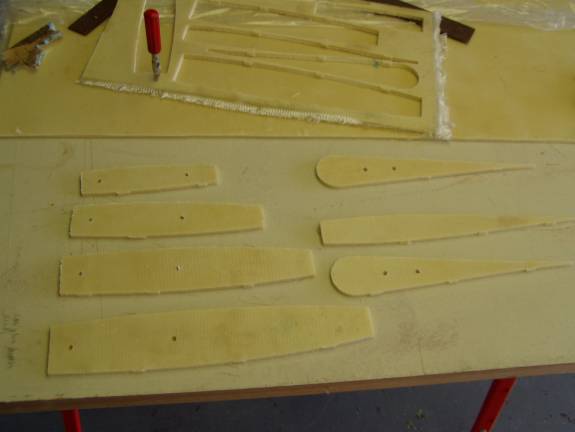
Finished Set of Horizontal Stab Parts
Looks like we are making progress.
Adding flanges to the ribs
Step 9: One more feature has to be added to the ribs before these parts are complete. Flanges are created by using a custom made flanging tool. We will be adding flanges to both sides and both edges of HRIB1, HRIB2 and HRIB3 as well as both edges on the inboard side of HRIB4.
Cut scraps of ¼” last-a-foam 1” wide and about 12” long. Glue two of these to another scrap 2.25” wide and 12” long. Use bits of scrap ¼” foam to create the space between the smaller strips. Gorilla glue is the best glue for foam to foam. Apply gorilla glue to one side and spray the other side with water. We want our flanges about 5/16” from the edge, so we need to build up the SFT (special flanging tool) with several strips of duct tape. The reason for this is that we will be sheeting with 3/8” foam sheets shooting for a nominal foam thickness of 5/16”, not more than 3/8” and not less than ¼”.
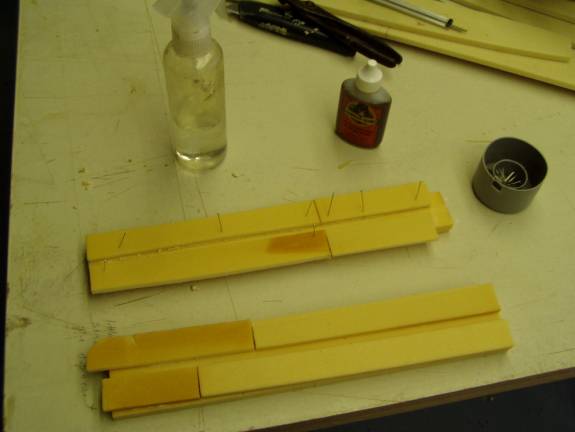
Flange Construction
Step 10: The construction of the horizontal ribs are completed
with the addition of flanges on both the top and bottom edges. Flanging
tools can be made with strips of foam as shown above. The goal
is to create a flange 5/16” below the edge of the rib. This
is done by glueing ¼” foam strips to another strip
of foam, then covering with three layers of duct tape. Use
the rib to obtain the proper spacing of the smaller strips of foam. Gorilla
glue or polyurethane glue is great for gluing the foam strips,
just be carefull that the parts are well secured as the glue expands
somewhat.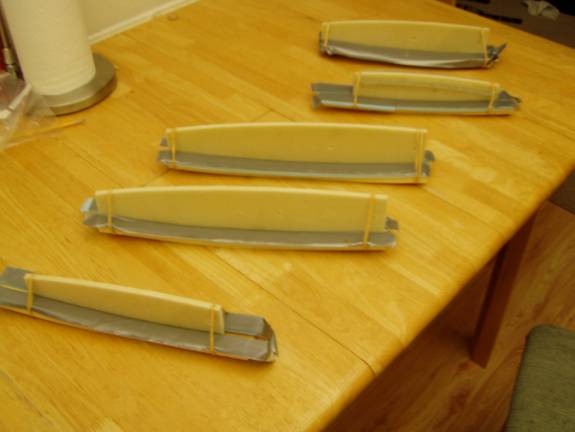
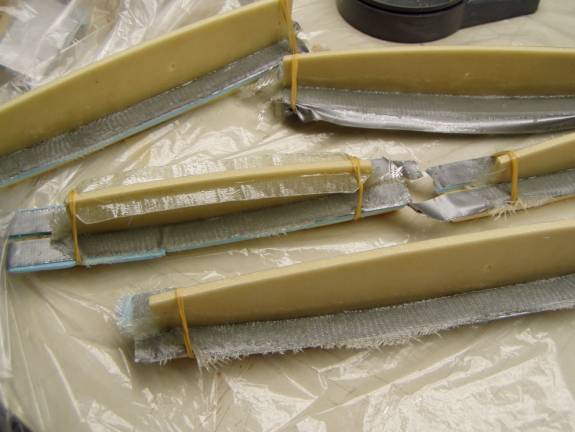
Flanges Held in Place
Step 11: Insure that the ribs are completely seated in the
flanging tools. The
flanges determine the skin thickness of the horizontal stabilizer. We
are targeting a thickness between ¼” and 3/8”.
Cutting Glass for Flanges
Step 12: Cut 2” wide strips of fiberglass to create
the flanges from. Be
sure to cut the glass on the 45 degree bias. This should go
without saying.
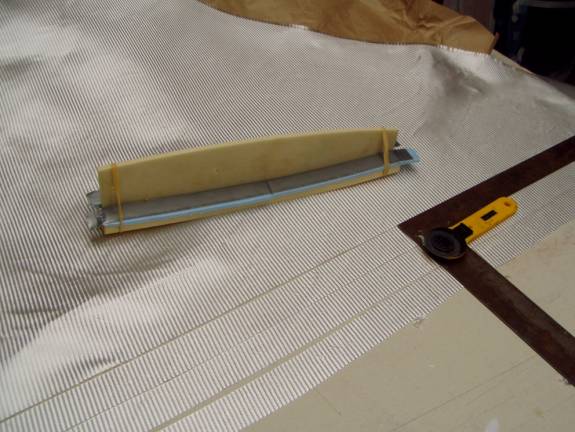
Flanges Curing
Step 13: Layup the flanges, two layer of BID on the 45 degree bias. The flanges should be about 1” on the rib and one inch overhang. Let cure.
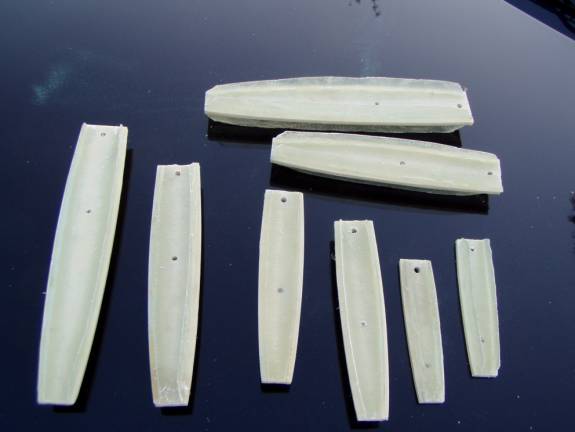
Completed Ribs
Here are our completed ribs. Redrill the air holes if they were covered up by the fiberglassing of the flanges. Remember that the smallest two ribs are only flanged on one side. OK, we are ready to assemble the horizontal stabilizer.