Chapter 3 - Fuselage
Section 2 - Rear Fuselage
Folding the Rear Fuselage to Shape and Final Trim
Let the panel fully cure. Remove the peel ply and inspect your handywork. We are now ready to fold it into a tail cone. Clearly mark the center line of the panel as shown in the next photo. Grab the E former used to make the forward fuselage half and make a mark on the cross member 2X2, as shown in the following photo.
Secure the top 2X2 cross member to the panel with two 2.5” sheet rock screws and fender washers. Space the former about 2” from the edge of the panel. Now gently fold the fuselage sides down and secure to the side members of the former. The former should be evenly spaced from the fuselage sides, again about 2” from the edge. The photo after next shows the correct placement of this former. Secure the tail end of the fuselage sides to each other with a ½” spacer block. The fuselage sides will have a slight twist in them as they transition from the tilted sides at the front to vertical sides at the rear.
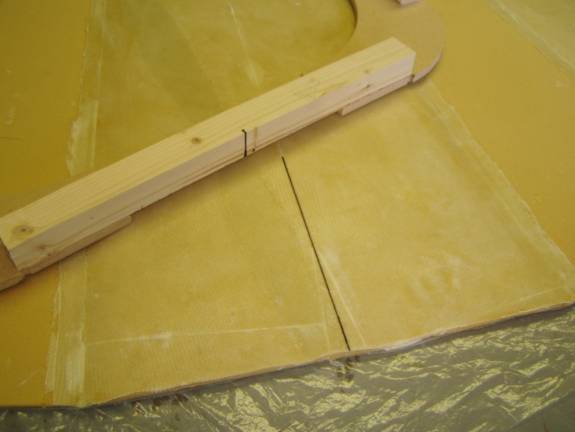
Preparing to fold the panel
Trimming the Rear Fuselage
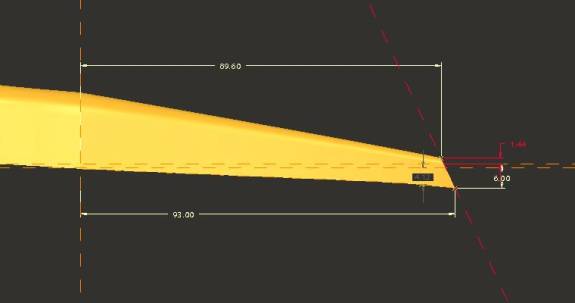
Out next job is to make the cut at the front of the fuselage and the rear of the fuselage. First we need to level the rear fuselage tail cone up side down with respect to the level line of the fuselage. Flip the tail cone over and orient it as in the following photo. The forward side of the tail cone is a couple of inches long and we will need to cut this off. Make a mark 2” back from the front edge of the tail cone on the lower front edge of the at the aft end of the fuselage side. This will be our second point. Reference the following drawing to understand the points orientation with each other. We will use a laser level to place the aft edge of the fuselage 6 inches lower than the front edge of the fuselage. That is, make a third point on the fuselage side, 6 inches above the point at the aft end of the fuselage. Then a line passing through the first point and this third point should be level. Use a laser level to make this so. Use a carpenter’s level to level the fuselage side to side.
Leveling the rear fuselage section
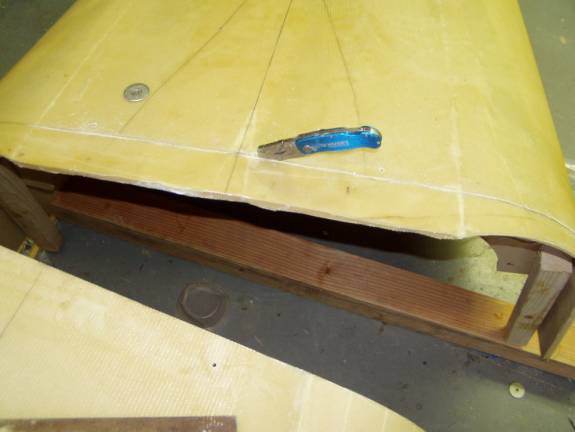
Using a squar,e draw a line on the bottom of the fuselage, two inches back from the front edge. This line should be perpendicular to the center line. In the following photo, the knife is cutting the line I’m speaking of. Use the laser level with a vertical beam to continue this line around the radius and down the side of the fuselage. The knife is cutting this line in the photo after next.
Trimming the front side of the Rear Fuselage
Once the forward edge of the rear fuselage section is defined, use a razor blade to cut away the extra material Use multiple strokes of the razor blade to cut cleanly through your pencil marks.

Trimming the Fuselage Rear Section
We are now ready to join the front and rear fuselage sections.