Chapter 3 - Fuselage
Section 3 - Joining the Fuselage Halves
Installing the Bulkheads
There are two bulkheads installed in the tail section of the fuselage between the tail and the seat back. One is referred to as the baggage bulkhead as it creates the rear wall of the baggage compartment. The smaller one is referred to as the center bulkhead and is located in the center tail section. We will begin with the installation of the center bulkhead.
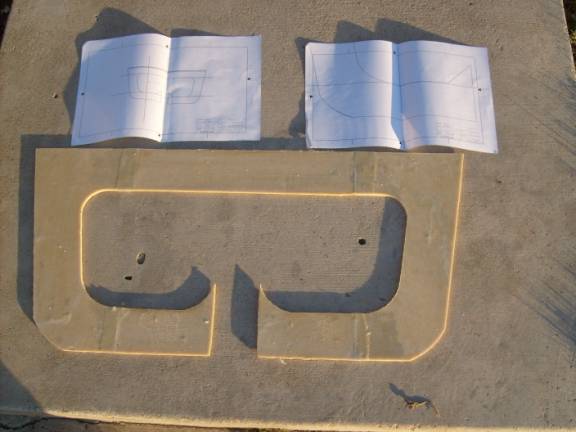
Printout the drawings for the center bulkhead and make a full sized template.
Create the bulkhead from ¼” 4.5 lb. last-a-foam and finish each side with a single layer of BID. The bulkhead can be fashioned from a single sheet of foam, or of several smaller pieces joined with thick micro as I have done.
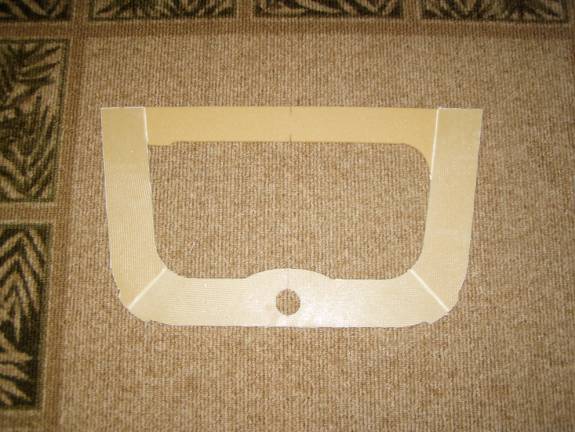
Center Bulkhead
Level up the fuselage and place a mark on the top of the fuselage sides 110” inches back from the firewall. Layup a single layer of BID over the radiused section centered here at 110" inches and let cure. Once both bulkheads are installed and the shape of the rear fuselage is locked down we will finish glassing in the rear fuselage inside radiused sections.
Using a level, extend this 110" line down the fuselage sides vertically as shown below.
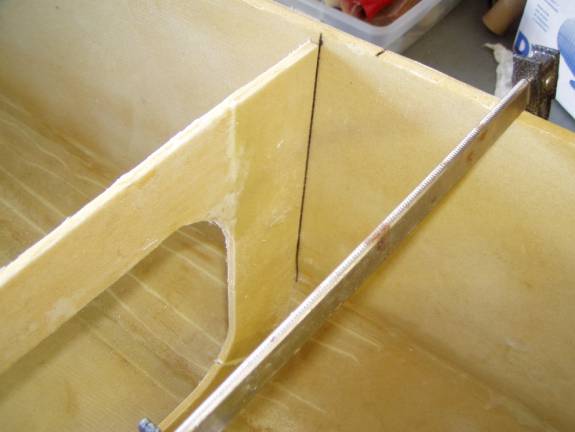
Mark Showing Bulkhead Position
Place the bulkhead into position, using the line as a reference on the front side of the bulkhead. The lower rounded corners may need to be sanded to get a uniform fit.
You are attempting to get a perfect alignment along each side and along the bottom. If there are gaps in the corners, it is OK as this will be filled with micro. Use clamps to pull the sides together or a stick cut to the proper length, wedged between the sides to spread the sides. Take your time to get good fit and alignment. It is the bulkheads that define the shape of the fuselage.
Mark the fore and aft side of the bulkhead so you don't put it in backwards as you trim it and reposition it.
Use CA (super glue) to tack the bulkhead into position.
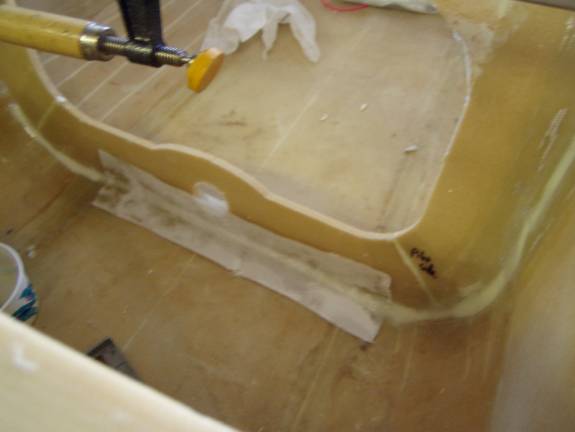
Mix up a thick batch of micro and create a nice radius along the intersection of the bulkhead and the fuselage.
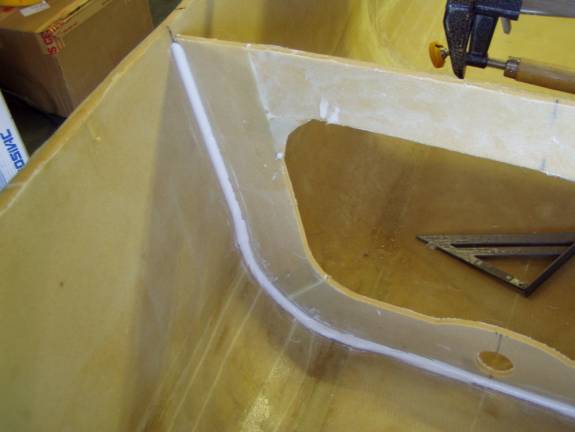
Thick Micro Radius
Rough up the area to be laid up with sandpaper and clean with acetone.
Layup 2 layers of BID on both sides of the bulkhead/ fuselage interface. This only needs to lap about an inch to an inch and a hlaf onto the fuselage side and the bulkhead.
2 Layer BID securing Bulkhead
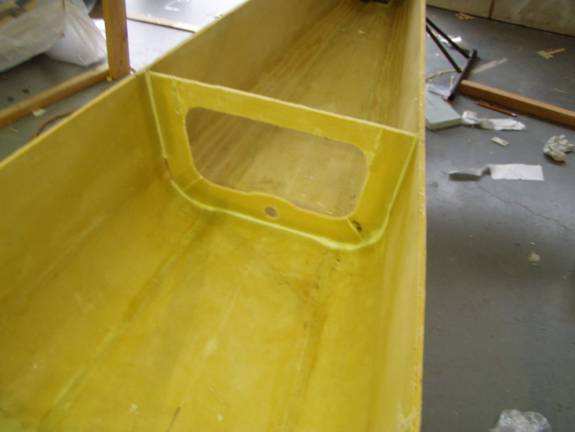
Installed Center Bulkhead
Let cure.
Dig out an 1/8” of foam along all the edges of the bulkhead including the hole in the center lower section.
Replace this foam with a thick micro mixture.
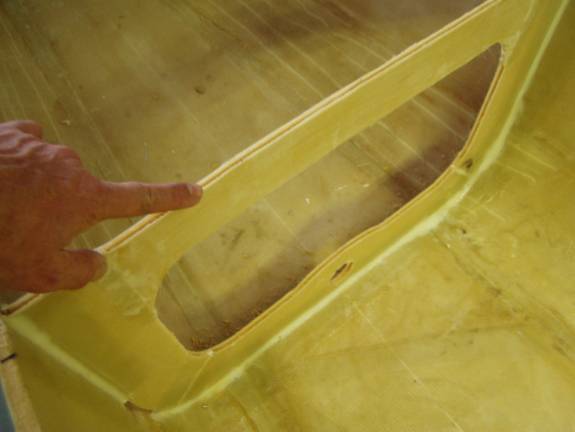
Seal Edges
Nice job. Now repeat the process for the baggage bulkhead. Remember toinstall the 6 inch wide BID over the radiused section before installing the bulkhead.
Print out the following templates for the baggage bulkhead. There is a drawing showing the bulkheads dimensions and a full size template of the lower corner, and a full size template of the upper corner. This bulkhead is located 85” behind the firewall. The gap at the bottom should end up being 3.6” wide.