Chapter 5 - Gull Wing Canopy
Section 1 - Bonding Canopy
Frame Outer Skin Parts<
All seven of your outer canopy frame parts are fabricated and trimmed to size, the canopy itself is inverted in a stable orientation and you are ready to begin bonding the skins to form the complete canopy frame shape. We will bond the windshield bow halves to form a complete windshield bow, we will bond the rear pillar bow halves to form a complete rear pillar bow, and then we will bond these to the roof center section. Once these five parts are joined we will add the foam core, the canopy hinges and then the inner skin.
The door bottoms will be added after the top section is complete because the bottom door sections will not fit within our wooden support frame. Also we will want to align these to both the canopy top section and the fuselage to get a nice transition between the two.
Place plastic drop cloth over the canopy surfaced to protect it. Use rough sand paper to roughen up the carbon fiber in the area of the joint. Clean an area at least three inches each side of the joint. Lay the two front windshield bow parts into the canopy and align them so they just touch the line defined by the forward most windshield bow position and so that they mate with each other. Insure that the matting point is centered down the middle of the canopy as this will be used as a center line for later operations.
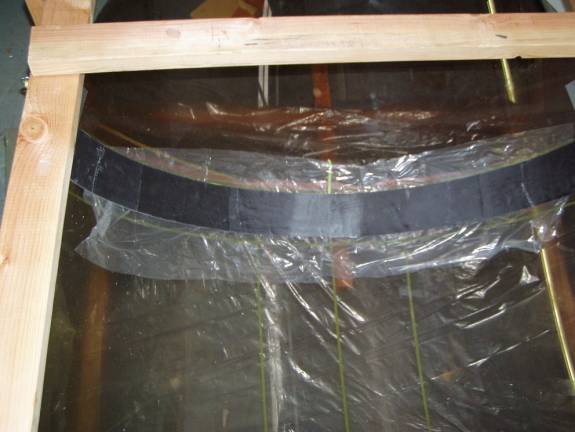
Windshield Bows positioned in Canopy
Using Carbon fiber BID, create a three layer laminate 4 inches on a side. Position this over the joint and mop up any excess resin with paper towels.
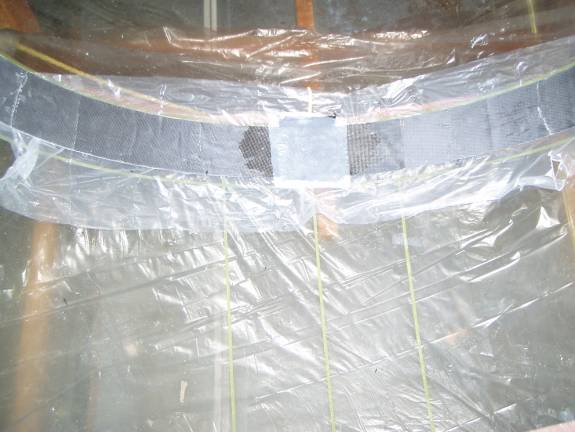
Carbon fiber layup Joint
Cover the wet layup with a piece of peel ply, double check that the bow is properly positioned in the canopy and let cure.
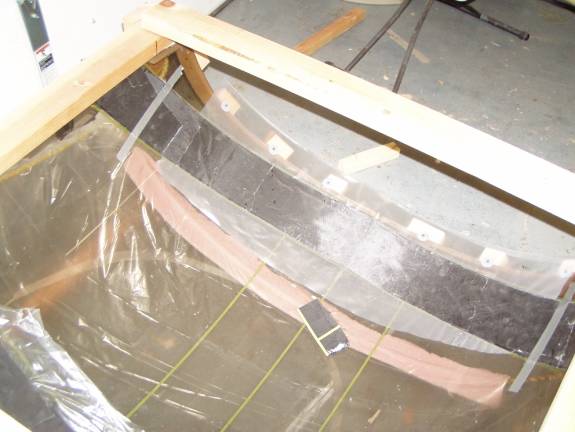
Rear Pillar Bows positioned in Canopy
Repeat this process with the rear pillar bows. Create a joint layup that is three layers thick and extends at least 2 inches each side of the joint. You may have to get creative to hold the bows in the proper place and tight against the canopy. I used duct tape to hold the bows in position and a clamp to support while curing.
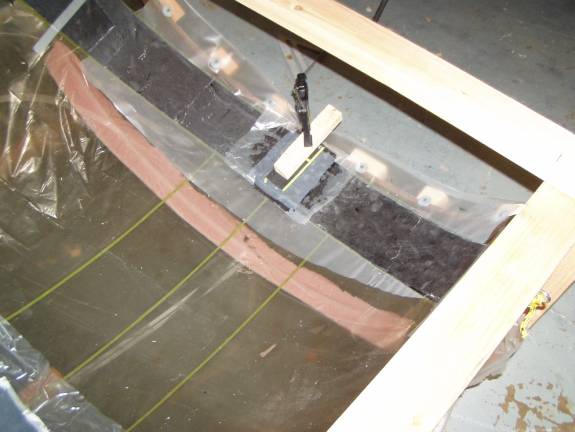
Joining rear Pillar Bows
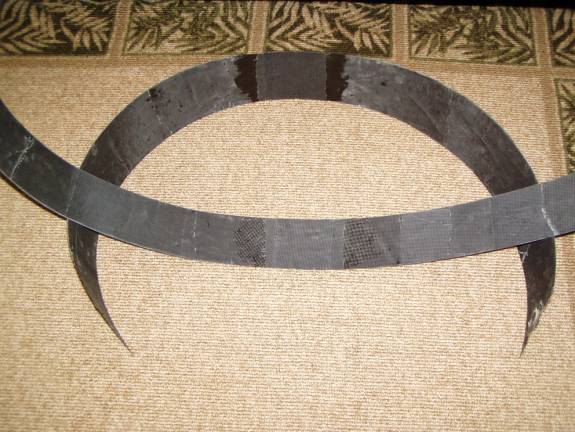
Joined Windshield and Rear Pillar Bows
Once the bows are cured, remove them from the canopy support frame and trim the new layup. Use sandpaper to create a continuous, straight edge on both sides of the joint.
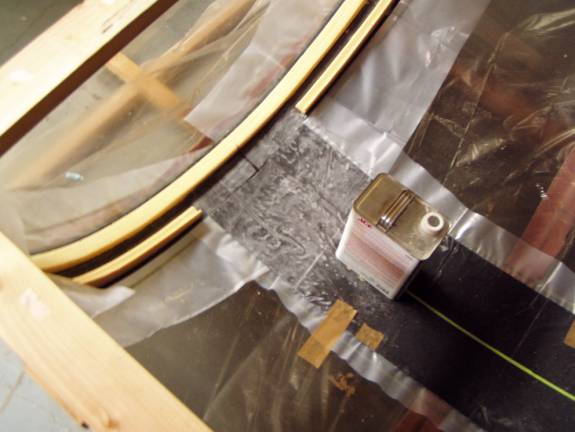
Positioning Roof Section to be Joined
Place the windshield bow back in to the canopy frame, using plastic to protect the Plexiglas of course. Position it as before, against the forward windshield marking and centered side to side. Take the roof section and prepare the surface for bonding; roughen it with a heavy grit sand paper and clean the surface with acetone. Prepare an area at least 14” in from the front and back edges. Then position the roof section into place against the windshield bow as shown above. Double check that you have the roof section oriented properly, that is the front is oriented forward and not toward the rear of the aircraft. Now is the time to insure that the roof section and the windshield bow are properly aligned with each other and solidly against the canopy. Use whatever techniques work for you. Above I have used tape and a heavy can to hold the parts in position. It is betterto get this worked out before you have a wet layup in the way.
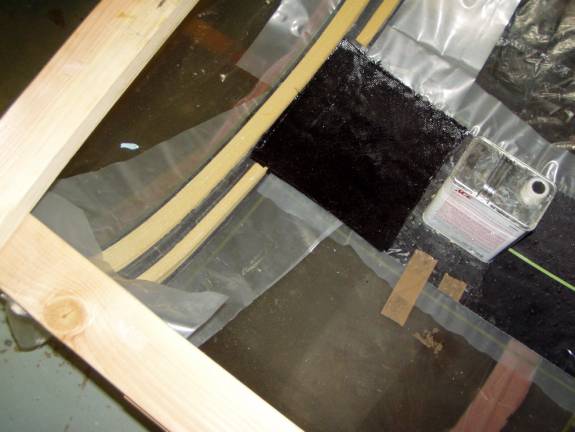
Joining the Roof Section
Create a 4 layer, Carbon Fiber BID layup 12.5” by 12.5” square and apply it over the joint. Insure that it overlaps the windshield bow by at least 2 inches. The reason that this layup extends so far on to the roof section is that a thicker outer skin is required to support the canopy hinges in this area.
Cover the layup with peel ply and let cure.
Repeat the operation to bond the rear pillar bow to the roof section. If everything is positioned correctly the rear pillar bow will be moved rearward 4 inches from its initial fabrication point. It will be hanging over rear of the canopy.
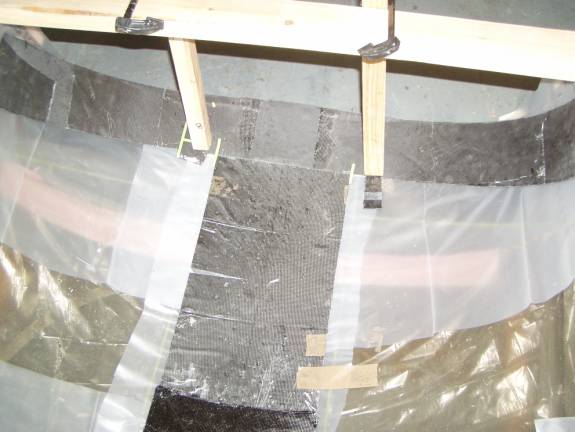
Joining rear Pillar Bow to Roof Section
Notice the combination of tape and 2 X 2s used to hold everything down tight against the Plexiglas canopy. Once the rear bow and the roof are positioned, use a joint layup 4 layers thick of Carbon Fiber BID. The layup should mirror the one used for the windshield bow. Cover with a layer of peel ply and let cure.
Once cured we are ready to install the canopy hinges.