Chapter 5 - Gull Wing Canopy
Section 2 - Fabricating and Installing the Canopy Hinges.
The canopy hinges consist of rod ends and an eye bolt on custom fabricated brackets. The following material is required:
2 feet of 2” X 2” X 1/8” 6061-T6 aluminum angle
4 each rod ends MM-4
4 each eye bolts AN44-14A
4 each washers
4 each washers
4 each nut plate K1000-4
4 each nut plate K1000-5
4 each an4-7A bolt
4 each AN365 nut
4 each washer for hinge point
Rivets
milled fiberglass
epoxy
32 screws AN507-10R8
32 1032 fiber lock nuts AN364-1032A
washers
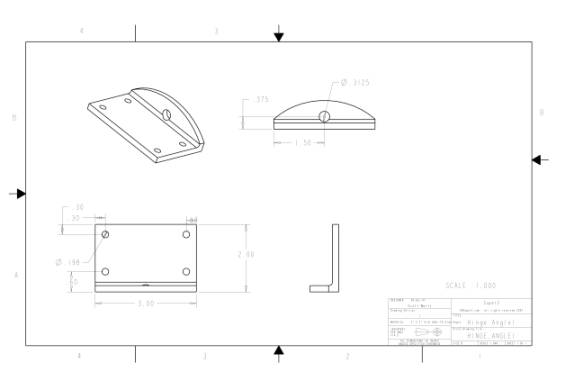
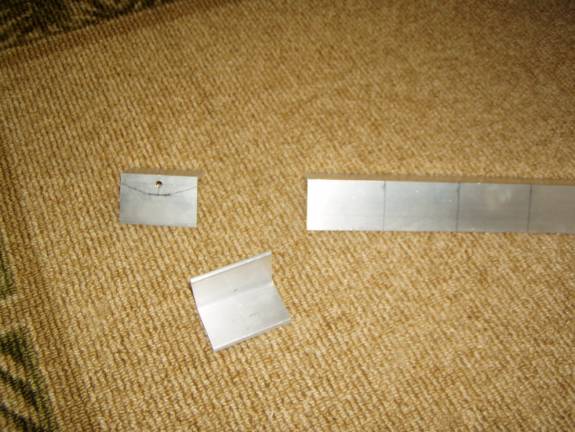
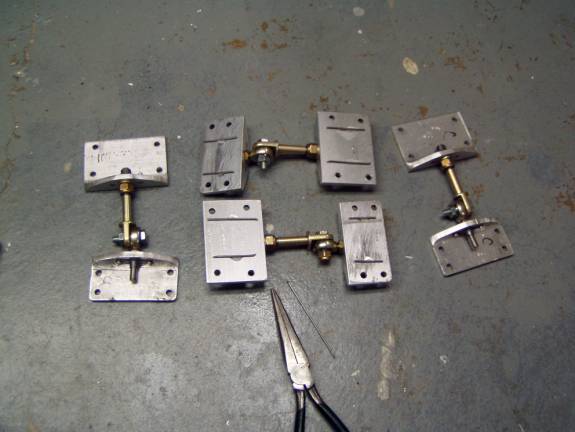
The canopy hinges are fabricated from a 2 foot piece of 2” X 2” X 1/8” 6061-T6 aluminum angle. Print out the following drawings and plan to make 4 canopy frame hinge brackets and 4 canopy door hinge brackets.
Canopy
Door Hinge Bracket Drawing
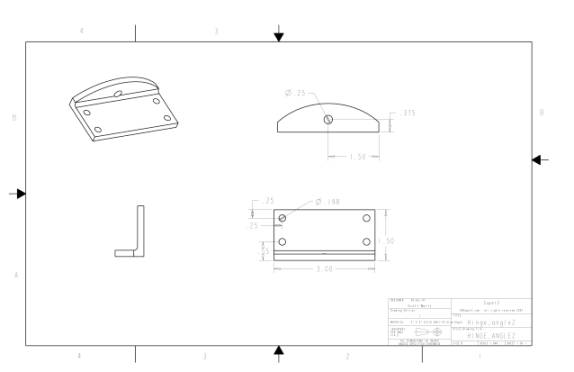
Canopy frame bracket drawing
Cut 8 each 3 inch inch lengths from the angle stock. Use the 1:1 drawings to locate the holes and drill them as specified. Finally shape the hinge brackets to size.
Rivet the K1000 nutplates in place.
Install the rod bearings with the AN316-4 thin nuts to the canopy door hinge bracket. The rod bearing should be threaded all the way in.
Install the eye bolt with the washer to the canopy frame bracket.
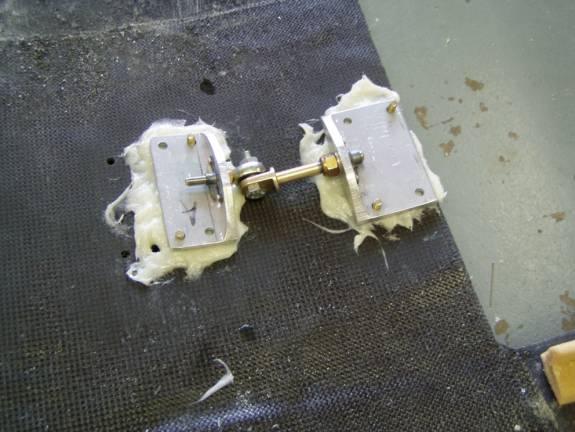
Use the AN4-7A bolts, washers and AN365 lock nuts to secure the two halves of the hinge together and adjust the length of the eyebolt so that the opposing faces of the hinge brackets are about 2 5/8” inches apart.
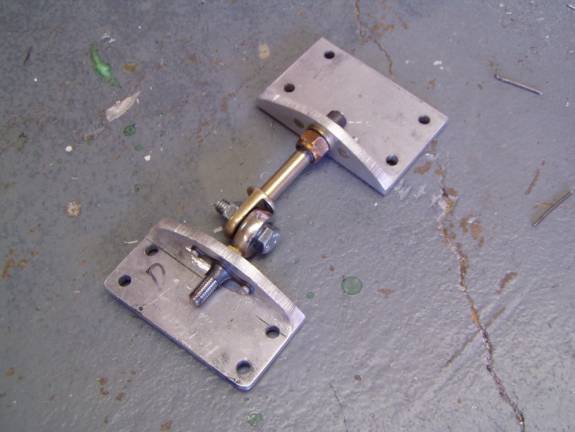
Completed Hinge assembly
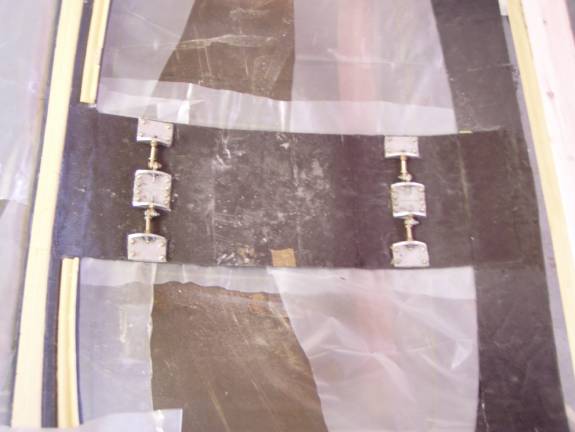
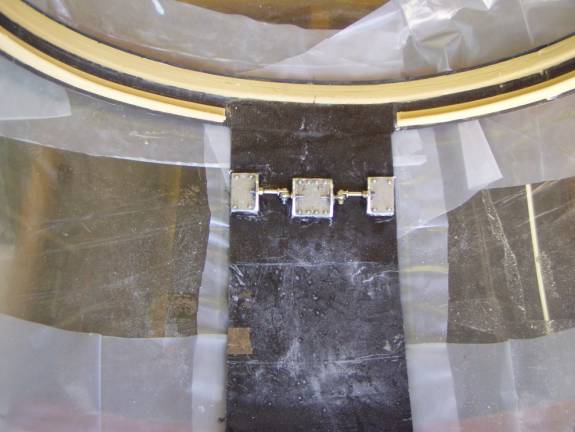
Now position the completed hinge assembly into the canopy frame as shown below. The two front hinge assemblies are installed first. The forward mounting holes of the hinge brackets are located 4 inches back from the rear edge of the forward bow. Insure the hinges are square, the two center brackets are touching, and then drill the 16 holes through the carbon fiber canopy top. Notice that the eye bolts are oriented toward the front.
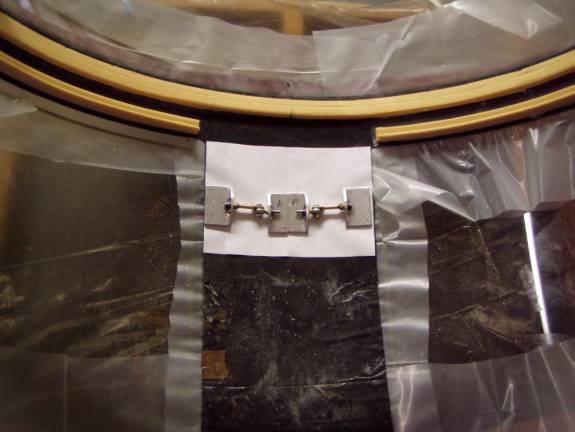
Proper location of hinge assemblies
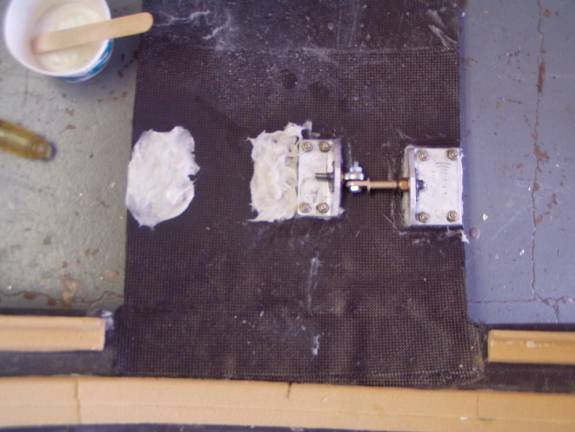
We will now permanently mount the hinges to the canopy top. We want to solidly bolt the hinge assemblies to the canopy frame, but do not want to deform the shape of the carbon fiber skin. We will create a mounting pad under the hinge from milled fiber glass and epoxy resin. First we will CA glue small pieces of 1/16” music wire to the bottom of the hinge brackets to act as spacers.
Wire CA glued to bottom of hinge brackets
Prepare the screws and nuts by soaking them in a mold release solution. Use AN507-10R8 screws and AN364-1032A lock nuts.
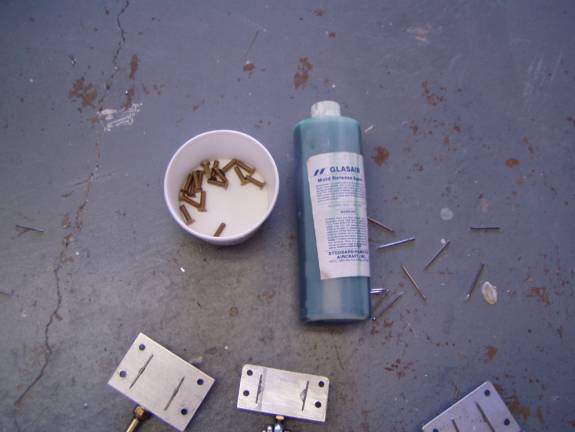
Soak the nuts and screws in a mold release
Mix up a thick batch of milled fiberglass and epoxy resin. Smear this mixture on the inside of the canopy frame and install the hinge brackets with the screws and nuts.
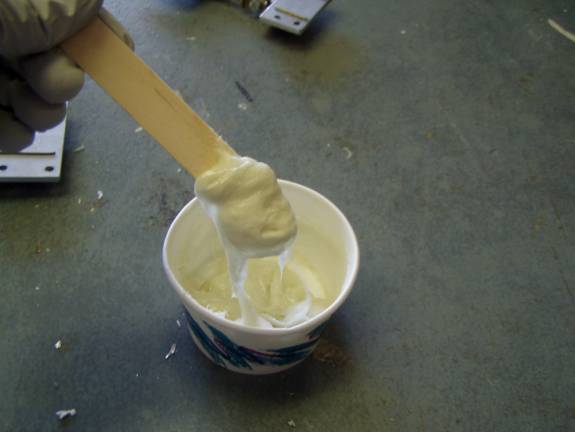
Thick milled fiberglass misture
The screws and nuts should be very lightly tightened. We want absolutely no deformation of the canopy skin, but we do want the hinges seated down against the skin.
Let the milled fiberglass mixture ooze out.
Wipe away the excess milled fiberglass mixture and inspect the edges of the hinge brackets to insure they are evenly seated. Do not over tighten the nuts.
Install all of the screws and nuts.
Let the Milled fiberglass mixture cure.
Remove the screws and nuts. Counter sink the holes on the top side of the canopy skin and reinstall the screws and nuts. This time you can torque the screws down and no deformation should occur.
Hinges completely installed.
Repeat the process for the rear hinges. The rear most mounting holes of the rear hinge assemblies are located 4.25” inches in front of the front edge of the rear bow.