Chapter 8 - Mounting the Wing to the Fuselage
Section 1 - Wing to Fuselage
Wing attach to fuselage
Now back to aligning the fuselage to the wing. Set the fuselage on the wing with the wing spar passing into the spar slot. Support the tail of the fuselage and level it up. Insure that the spacing is equal between the fuselage sides and the A ribs. I used two scrap pieces of 1/2” phenolic to act as spacers to keep this distance even. Drop a plumb bob down off the top of the vertical stab and make a mark on the ground to show roughly where the aft end of the fuselage will fall.
Now measure back to this aft fuselage mark on the ground from the two points defining the wing tip position marked on the ground. Find a point that is equidistant from the two wing tips and roughly the same distance form the center spar line as the initial aft fuselage mark. Finally, use a laser level to paint a line on the floor connecting this mark to the line marking the center of the spar. Again use your sharpie or other technique to draw this line on the ground near the back of the fuselage and under the firewall. Plump bobs will be used to align the fuselage to these lines.
We now have all of the required reference marks, and it is time to test level up the aircraft. Start with the wing. Center it properly on the spar center line and use plumb bobs at each wing tip to position it properly. Then level it in both axis. I clamped a carpenter’s level the center spar section to define one axis and I used a water level between the wing tips to insure level in the other axis. The water level was a 30 foot length of clear plastic tubing filled with grape crystal lite (colored water with no sticky sugar). Since the wing is balanced at the center, it helps to have small stands at the wing tip to stabilize it. Make sure these do not support any weight, just keep the wing from wobbling. At this point practice checking the proper position and leveling of the wing. When the time comes to bond our into the fuselage we want to be able to smoothly check all degrees of freedom on both the wing and the fuselage.
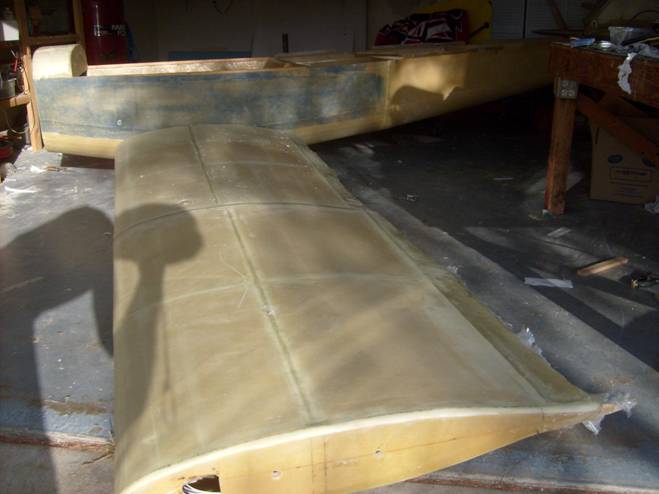
Fuselage sitting on the wing
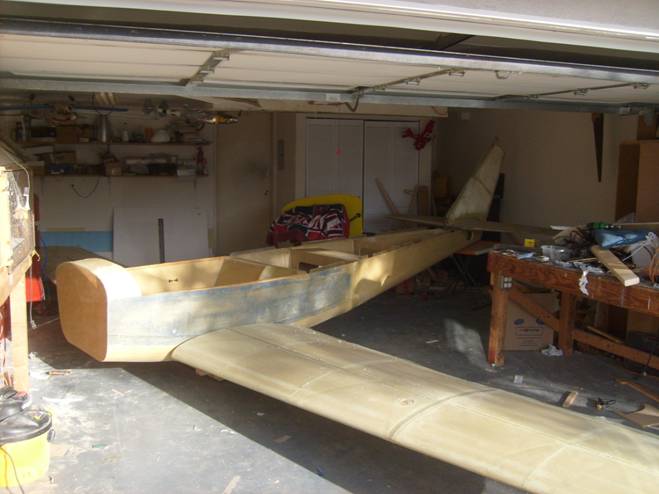
Fuselage sitting on the wing
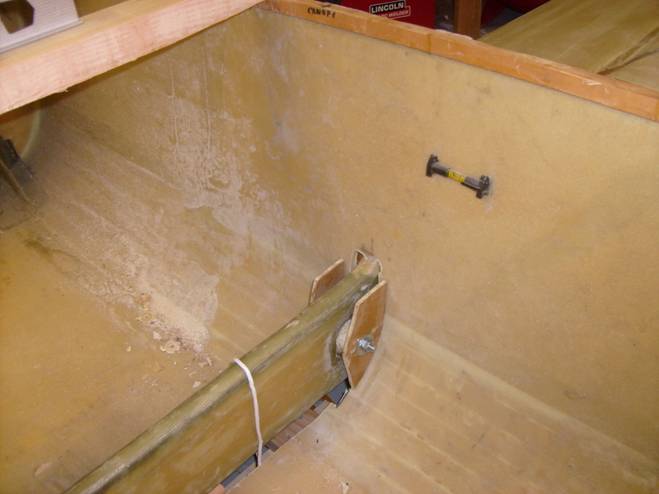
Now lower the fuselage into position. Just let the forward fuselage rest on the spar and support the tail. Install the phenolic spar support plates being careful to get the correct ones in the correct place. The slot in the sides of the fuselage should allow the fuselage to rest lower than its final position and the plates should be easy to install. Use hardware grade bolts for the initial fit up. Use a single 1/8” washer between the forward support plate and the spar to leave room for fiberglass to be added later. Insure that the inboard edges of the support plates are vertical.
Now raise the fuselage until the spar support plates are in contact with the fuselage, keeping the fuselage level as you do so. The bottom of the spar should be just above the outside fuselage skin on the bottom of the fuselage. If the spar is too high, trim away the fiberglass skin on the inside of the fuselage and let the wing sit lower. If the spar plates are off the bottom of the fuselage floor, you are fine, this will be filled later.
Once you are happy with the way the fuselage and the spar mate, true up the fuselage by centering the firewall and vertical stab on the fuselage center lines. Make sure the fuselage is level in all axis. I also use a laser level painting up the front side of the vertical stabilizer to insure it is perfectly vertical.
Once the fuselage is positioned properly and leveled go back and double check the position of the wing and its level. Check the spacing between the wing and the fuselage sides. Are the aft spar support plates equidistant from the fuselage as well?
It is time to double and triple check the position of the fuselage and wing. We are nearing the time to bond in the phenolic spar support plates to the fuselage. When you think you are ready to bond these in, go away, take a breather, then come back and re-check everything.
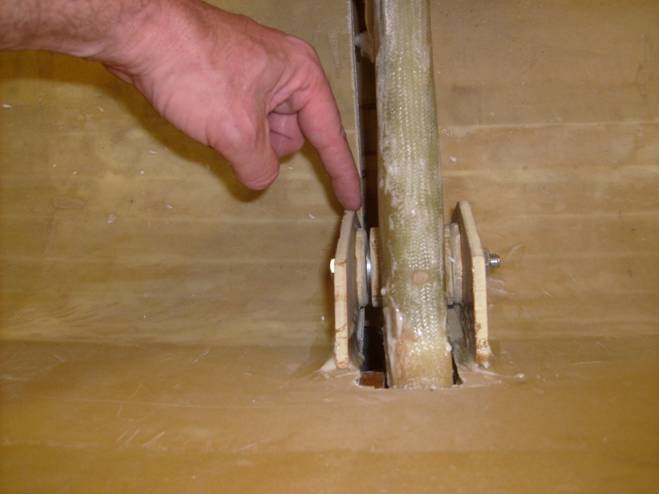
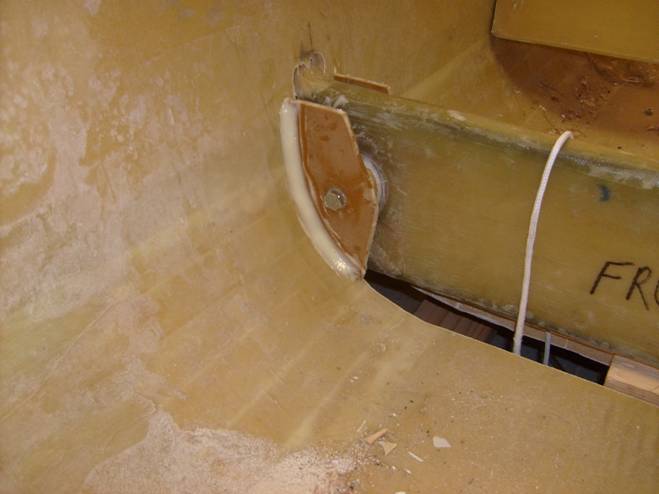
Insure 1/8" spacer is in Place between forward support plate and spar
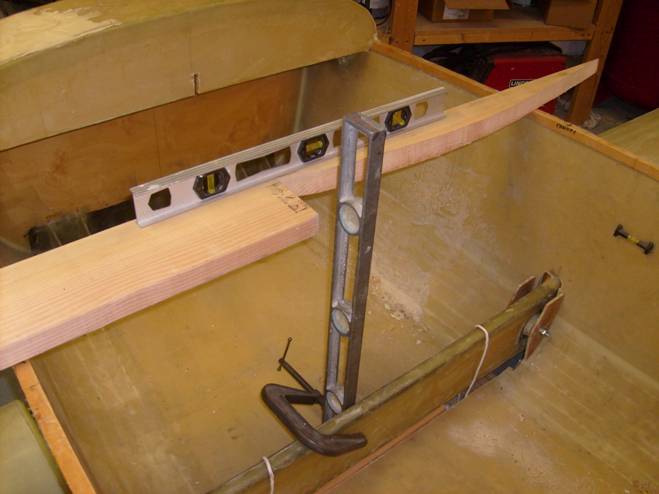
Fuse level side to side, Wing level front to Back
Fuselage level front to back
Spar Support Plates resting on inside fuselage
1/2" spacer between fuse and A rib
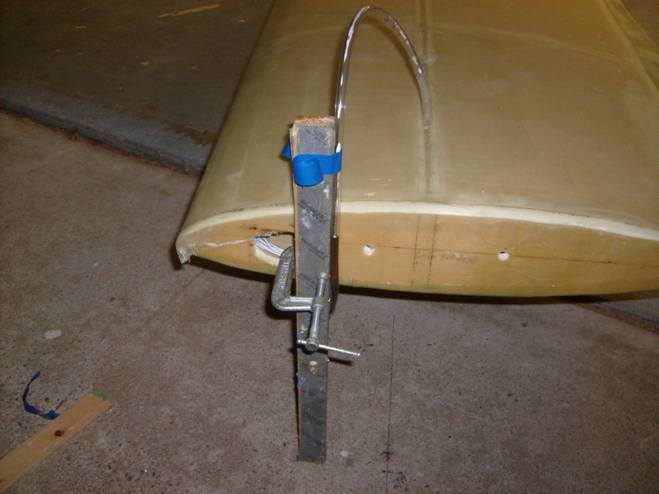
Water level insure wing is level tip to tip
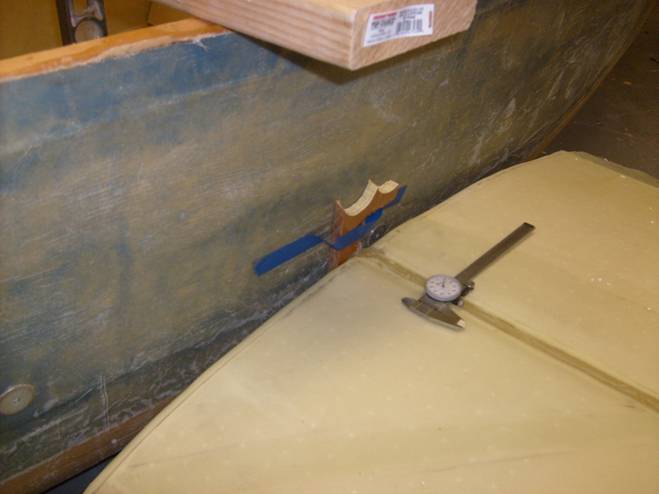
Fuselage spaced to A rib
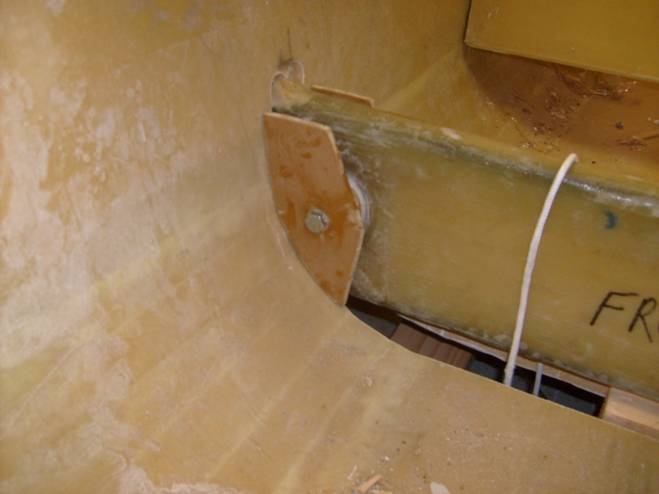
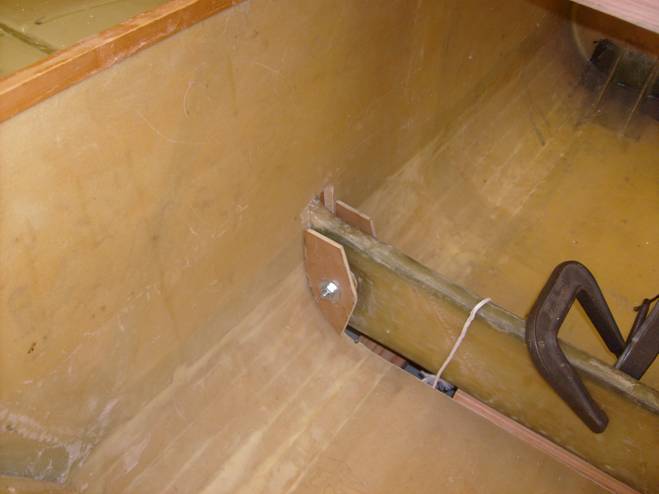
Close up of Spar Support
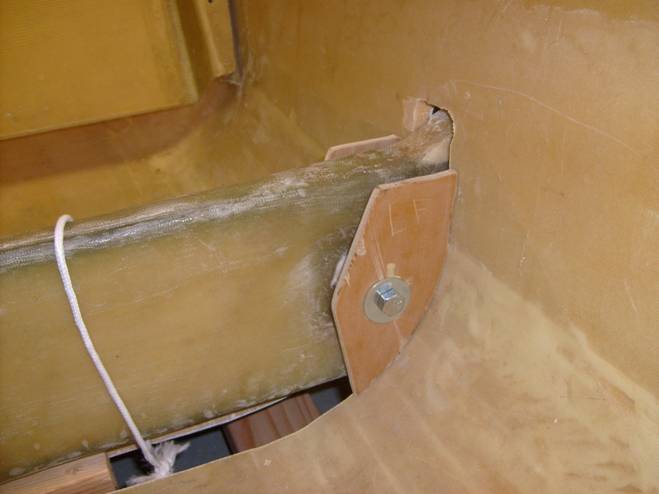
Close up of Spar Support
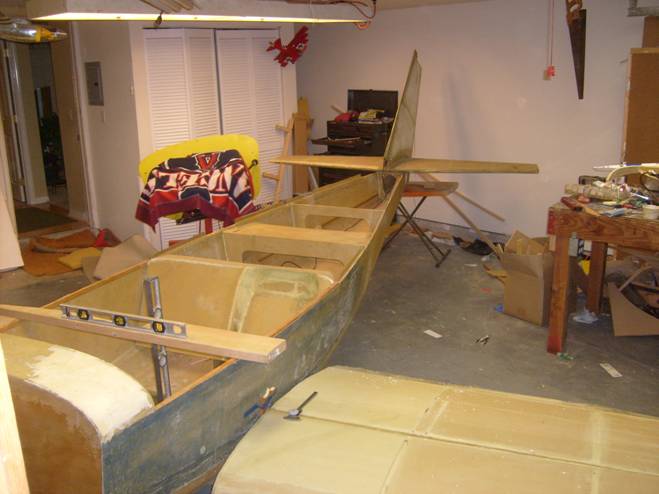
Everything Leveled up
Once you have checked, double checked and tripple checked each level and orientation indicator, bond the spar support plates to the insides of the fuselage. Use a generouse amount of 5 minujte epoxy and flox to create. Do one support plate at a time. We use 5 minute epoxy so that the set up does not have to sit long while our bond sets up. All we need is the pet cat to run over wing while the epoxy is setting up. Bond all of the plates and let the epoxy cure. Then with the utmost care remove the wing spar bolts, knockout the 1/8” washer, and carefully lift the fuselage away from the wing.1/2" readius inside and outside of each support plate along the entire length of the contact between the plate and the fuselage.
Bond Spar support Plates to Fuselage
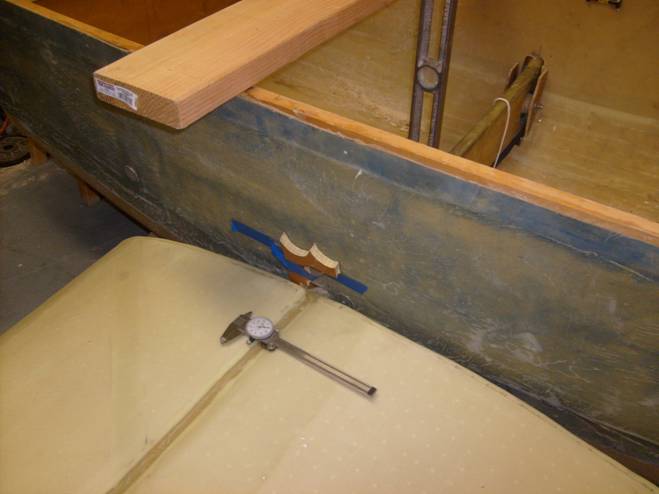
When the epoxy has cured, use a sharpie marker to draw a line on the sides of the fuselage on both sides representing the projection of the top wing skin. This will be used later to insure the wing is not twisted when the rear mounting plates are installed.
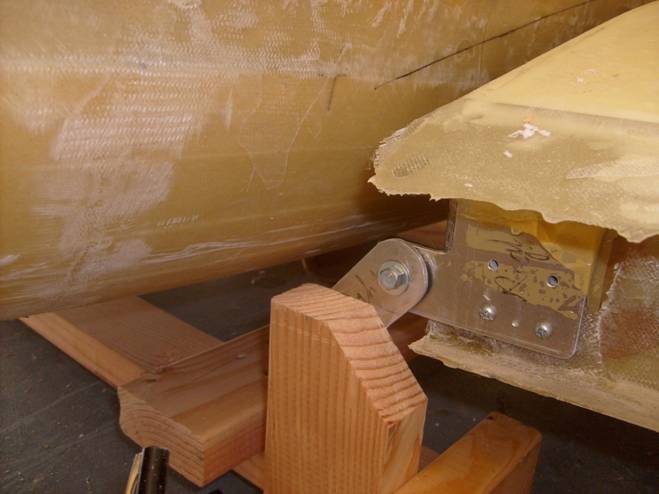
Position of aft spar plate to fuselage
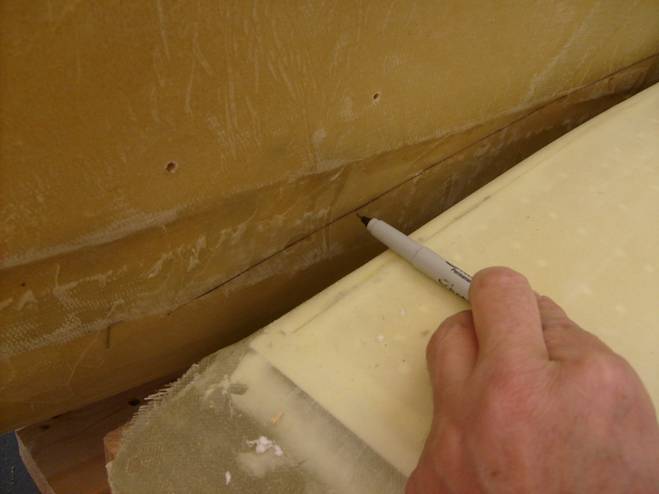
Use a sharpie to mark the location of the top wing surface to the fuselage side.
Carefully remove seperate the fuselage and the wing so as not to bump the wing support plates. When the bolts are removed, the 1/8" washer shold drop away giving plenty of extra room to lift the fuselage away.
Prepare the edges of the slot in the fuselage sides, the bottom portion of the slot can be dressed later when the spar tunnel is fabricated in the next section. Dig out foam and create a nice radius with epoxy and micro mixture.
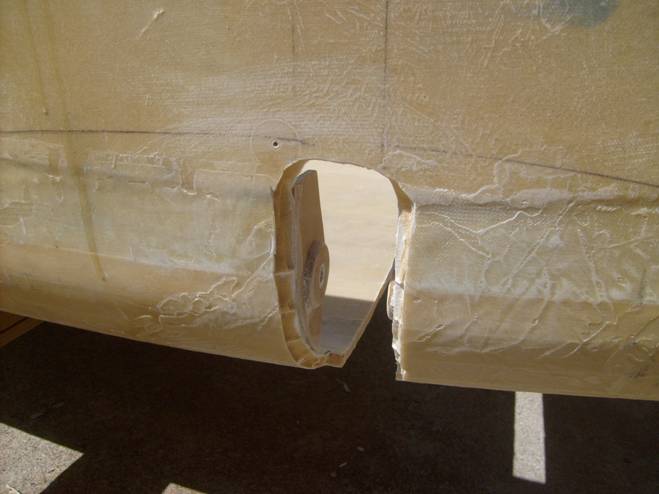
Prep the fuselage side of the slot
Apply a single layer of glass to dress out the fuselage side of the slot around the spar support plates.

Single Layer of Glass to finish off the side spar slot
Congratulations, go get a good nights rest.