Chapter 2 - Fabricating the Tail
Section 1 - Sheeting the Horizontal Stab
Horizontal stab skinning

In an earlier step we slurried and fiberglassed one side of two 24” X
48” sheets of 4.5 lb. Last-a-foam. These two sheets were
cured with a slight curvature to them. The curve was created by
supporting one of the long sides of the foam an inch or so off the work
surface with the curing glass side up. The sheets will sag and
give us a bit of a curvature which will make attaching them a bit easier.. We
will be cutting the horizontal stab panels in such a way that one sheet
will completely skin one side of the horizontal stab.
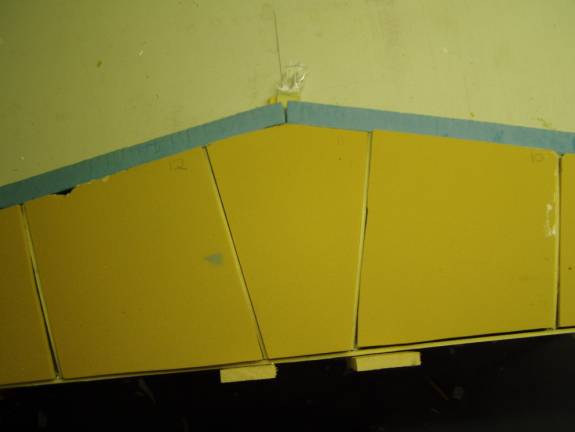
To insure we do not waste the foam sheet, it is cut in a certain way. Begin
by numbering each of the panels and its respective place. A pencil
can be used to ever so lightly number the 14 panel positions of the open
horizontal stab frame—place the number on the leading edge above
each position. Cut the center panels last and the largest inboard panels
first.
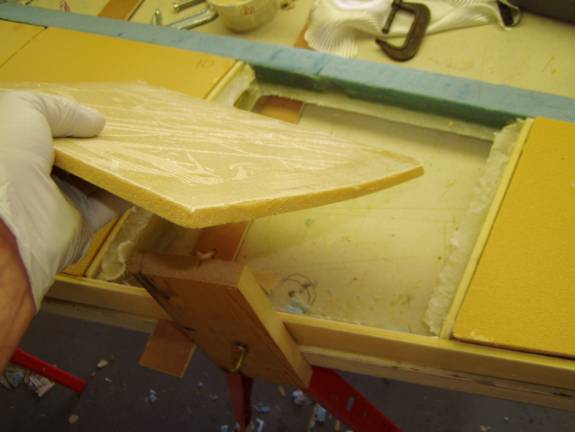
Completely cut and fit all panels before epoxying any in place. Once
all the panels are trimmed and you are happy with the fit, prepare to
install the panels on the non-flanged side. Remember, install the panels
on the side that does not have the flanges on the leading edge and spar
first. Put the horizontal stab back into your table fixture
and support it as before making sure it is square and level with no twists. Once
the first side is skinned, the horizontal stab becomes very rigid and
will take a set including any errors in leveling the assembly. Establish
a routine for mounting and squaring the horizontal stab assembly as there
will be several more steps before it is closed and glassed. At
each stage it becomes increasingly ridgid.
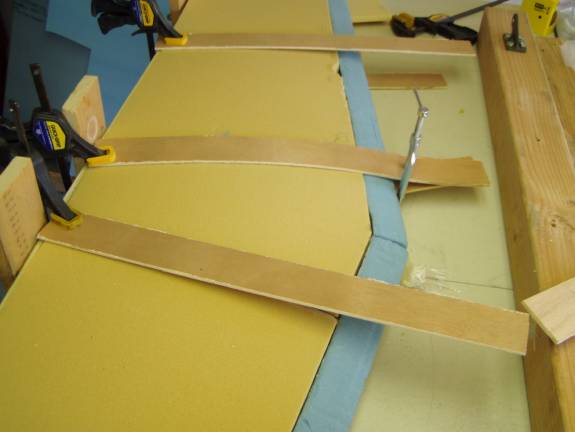
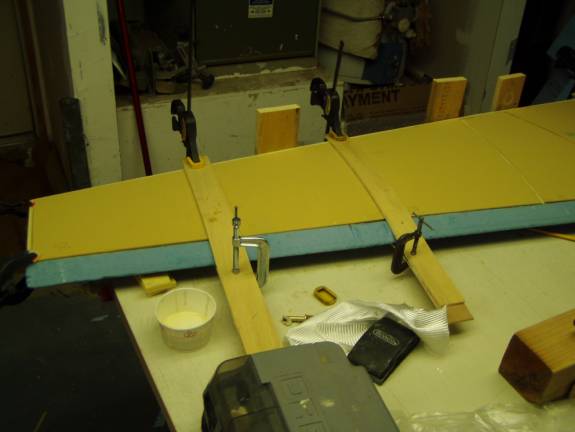
Cut strips of masonite or thin plywood to secure the foam panels in place. It
is best to clamp the rear of the strip to the horizontal stab itself
as opposed to clamping to the table. Clamping directly down to
the table increases the chance of distorting the stab assembly. Do
not clamp to the leading edge as it is very soft and delicate at this
stage. Instead, slide a second strip of plywood under the
horizontal stab assembly and clamp them together. Be gentel. Do
not damage the leading edge, but insure the panels are securely held
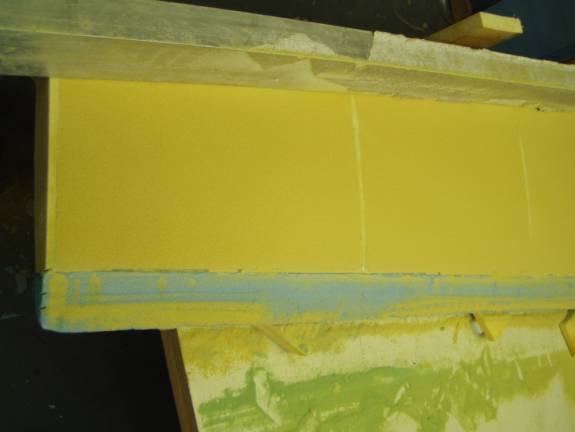
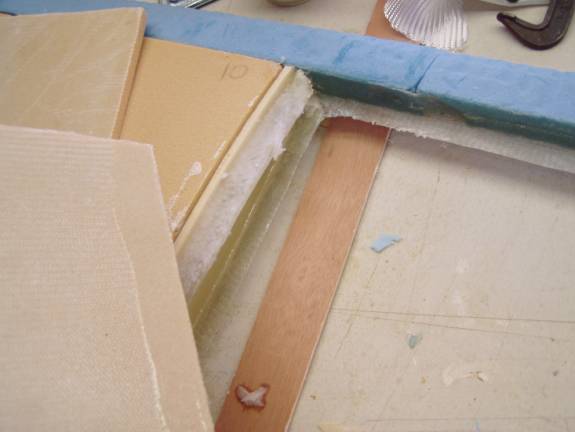
against the rib fla\nges. The sheeting should extend above the
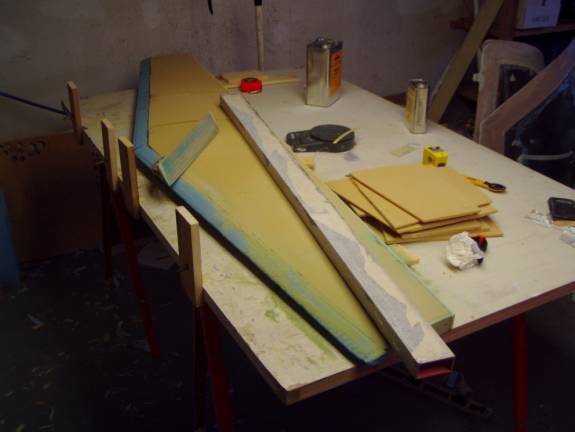
edges of the ribs, leading edge and spar by about an 1/8”.
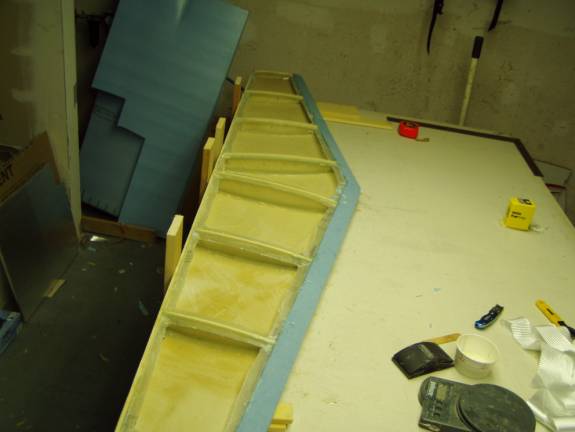
This is a good time to insure you have the horizontal stab in the correct orientation. The side with full flanges should be mounted down and we will panel the side only with rib flanges first. Notice the curvature of the panel in the photo above.
Once you have all of your clamps and wood strips in place and have tested
the clamping arrangement, prepare the rib flanges and the panels surface. Use
rough sandpaper, 40 or 60 grit, to roughen the flange and panel mating
surfaces. We will wipe them down with acetone prior to permenantely
attaching them.
Mix a 75 gram batch of epoxy, mix it well and then thicken it with flox. The mixture should have a thick consistently, but not dry. Apply the flox mixture to the rib flanges. Make sure the flanges are completely covered with the mixture, but not too thick. The panel should also have a coating of flox, but just enough to wet the panel. Too much flox in the joint and it will just squeeze out under clamping pressure, too little and the panel joint will have edhesive voids.
Clamp the panels in place and let cure. Inspect each joint to insure it is settled correctly and that you have a uniform amount of foam extending above the ribs, leading edge and spar, again about 1/8”.
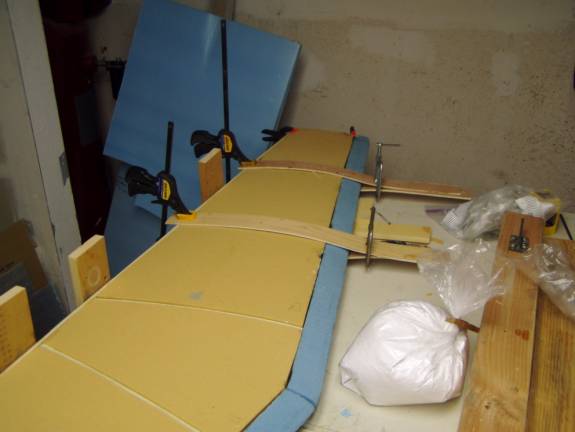
Once the panels have cured, flip the horizontal stab over in your fixture
and relevel it. We will now secure the panels to the leading
edge and the spar.
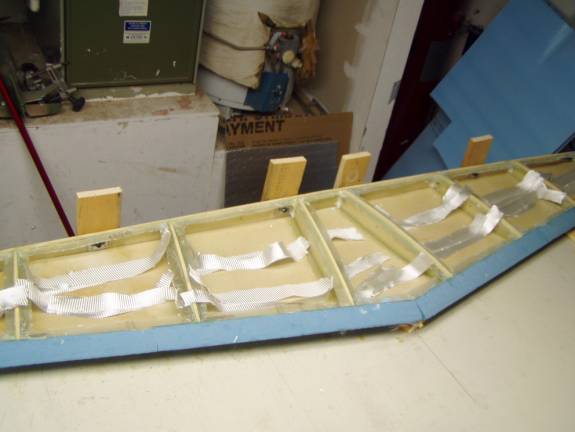
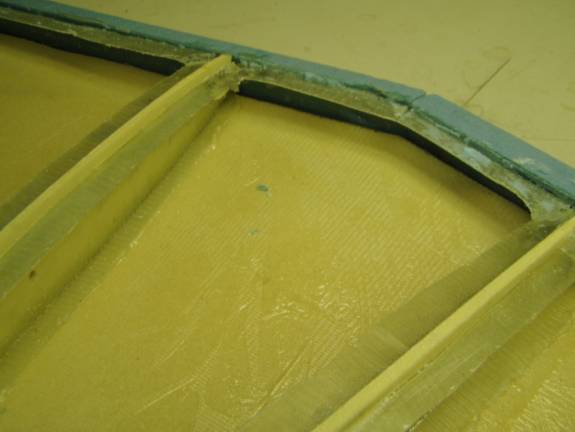
Cut strips of BID fiberglass on the 45 degree bias about 2” wide. Cut these strips to length a bit wider than each panel as the strips will wrap onto the ribs at each end. Cut two strips for each panel edge as we will be creating a 2 BID junction between the panels and the leading edge and spar. Above the strips are laid out and ready for epoxy.
Mix a 100 gram batch of epoxy and layup 2 layers of fiberglass to fully attach the panels. Each strip should overlap about ¾” of the panel and about ¾” on the leading edge or spar. The ends of the strips should wrap onto the spar about an inch.
Be careful not to get epoxy into the threaded portion of the nut plate,
but wrap the glass up over the aluminum plate itself.
Make a final check that the assembly is level and square and then let the assembly cure.
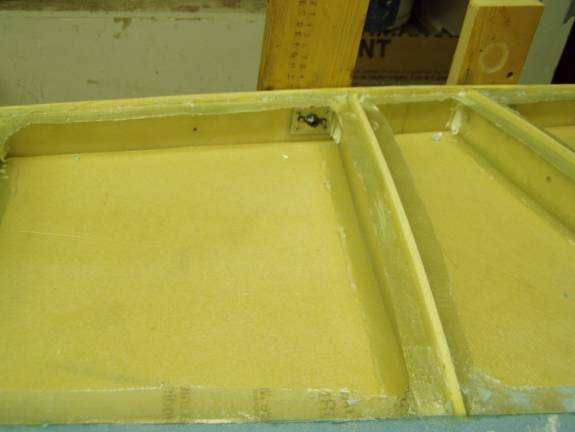
Once the epoxy has cured, inspect the inside bonds. Inspect the
holes in the ribs and make sure you have not glassed them over, if so,
then drill them open again. Air pressure must not be allowed to
build in any of the chambers. Flip the horizontal stab over and
sand the foam down even with the top of the ribs, spar and leading edge. Use
the long aluminum tube covered with roll sandpaper to make a long sanding
block to shape the horizontal stab. Be very gentle, do not take
off any foam from the leading edge and try not to sand the ribs or spar
down. Use a very gentle motion removing the foam, do not distort
the panels by pressing down too hard. Keep the sanding block oriented
span wise.
Bet.